
If you have ever reached a critical inspection and realized your tape is missing or your phone battery is at 5%, you already know this: on a construction site, the right tools can save your day—and your reputation. A smart site engineer does not rely only on the contractor’s kit; they build a personal toolkit that keeps them accurate, safe, and always ready.
This guide walks through the top 10 tools every site engineer should own, with practical examples from real site conditions. By the end, you will know exactly what to buy first, what to upgrade later, and how each tool helps you avoid costly mistakes and delays.
Why your toolkit matters more than you think
Site engineering is not just about drawings and calculations; it is about making decisions in a dusty, noisy, fast-moving environment where small errors can become big rework. Tools influence four things that define your performance: accuracy, safety, speed, and documentation.
When measurements are wrong, levels are off, or instructions are not recorded, you pay the price through extra work, tense arguments, and loss of trust. The right personal tools reduce dependency, cut down on confusion, and silently communicate that you are professional and serious about quality.
How this list is structured
Instead of mixing everything randomly, this list groups tools into four categories that match your daily routine:
- Safety essentials you should never compromise on
- Measuring and layout tools that protect you from rework
- Documentation tools that protect you during disputes
- Digital helpers that keep you connected and efficient
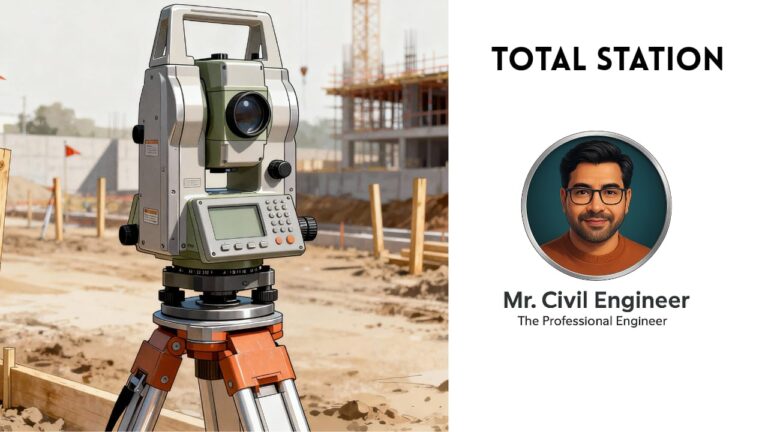
The focus is on items you can realistically own and carry—not heavy machinery like total stations or concrete mixers, which the company or contractor usually provides.
1. Safety helmet and safety shoes
Your first tools are the ones that protect you. A good safety helmet and a solid pair of safety shoes are non-negotiable, no matter how “light” you think the site work is.
On most projects, you will walk through reinforcement cages, uneven formwork, scattered nails, and wet concrete. A sturdy shoe with steel or composite toe and slip-resistant sole protects you from rebar stubs, falling tools, and slippery surfaces. A certified helmet shields you from minor falling objects, swinging hooks, or even accidental bumps into scaffolding.
Many companies issue PPE, but the quality and comfort can vary. Owning one good pair of shoes and a helmet means you always have reliable protection, which you are more likely to wear consistently.
2. High-visibility vest, gloves, and safety glasses
Visibility is a safety tool. On busy sites with trucks, cranes, and excavators, a high-visibility vest makes you instantly noticeable, especially in low-light or rainy conditions.
Gloves protect your hands while handling rebar, shuttering, bricks, and sharp-edged materials. Safety glasses are essential during cutting, drilling, chipping, and grinding to avoid eye injuries from dust and flying particles. Consistently using these simple items not only keeps you safe but also sets a standard; when workers see the engineer following PPE rules, compliance across the site often improves.
3. Measuring tape and steel scale
No tool represents a site engineer better than a measuring tape. From checking formwork dimensions and clear cover to verifying brickwork openings and tile layouts, a personal tape is used dozens of times a day.
Choose a 5–8 m tape with a strong blade, clear markings, and a reliable locking mechanism. A rust-resistant casing and belt clip are added advantages in dusty and humid conditions. Along with the tape, carry a steel scale (300–600 mm) for more precise, small-scale measurements such as reinforcement spacing, cover blocks, and finishing details.
Relying on the contractor’s tape is risky; if there is a dispute on dimension, having your own verified tape can make all the difference.
4. Laser distance meter (highly recommended upgrade)
As projects move toward tighter schedules and digital workflows, a laser distance meter becomes a powerful ally. It allows a single engineer to quickly measure room sizes, slab spans, corridor lengths, and wall heights without needing someone to hold the other end of the tape.
Laser meters are especially handy for interiors, BOQ verification, and estimation tasks. They reduce reading errors, save time, and feed directly into digital notes or checklists. However, they can be less reliable on highly reflective surfaces or in very bright outdoor conditions, so they complement your tape—they do not fully replace it.
5. Spirit level (or digital level)
Good alignment is invisible when done right but painfully obvious when wrong. A spirit level helps you maintain that invisible quality standard. You will use it to check floor levels, lintels, parapets, railings, door and window frames, and tile slopes in wet areas.
A short level (300–600 mm) is easy to carry and perfect for door frames and tiles. A longer level is useful for beams, parapets, and floor screeds. Some engineers now use digital levels, which display slope angles directly and are useful when specific gradients are required, such as for drainage. Combining your spirit level with a straightedge or aluminum section improves accuracy on wider surfaces.
6. Site diary / notebook and stationery kit
One of the most powerful “tools” on a construction site is not metallic; it is paper. A dedicated site diary or notebook is where you record daily progress, manpower, concrete pours, site tests, instructions received, and any abnormal events like rain or delays.
When there is a dispute months later about when a particular work was done, or who instructed a change, your diary becomes your shield. Along with the diary, keep a compact stationery kit:
- Black and red pens
- Permanent markers for marking on formwork, steel, and concrete
- Pencils and eraser for sketches
- Engineering scale for reading drawings
- Small clipboard to write even while standing in the field.
This mini “desk in your hand” allows you to clarify details, sketch solutions, and record instructions on the spot instead of relying on memory.
7. Drawing folder or document organizer
Drawings are your map. If they are dirty, torn, or mixed up with old revisions, mistakes are guaranteed. A sturdy drawing folder or document organizer protects your prints from rain, dust, and rough handling while helping you keep revisions in order.
A simple system works well: keep the latest revision at the front, with date and revision marked clearly. Store superseded drawings in a separate labeled section so they are not accidentally used on site. You can also keep printed detail blow-ups, checklists, and inspection formats in the same folder for quick reference.
8. Scientific calculator (or reliable calculator app)
Even in the era of smartphones, a dedicated scientific calculator earns its place in a site engineer’s bag. You constantly calculate areas, volumes, bar bending lengths, slopes, and mix quantities, often under time pressure.
A physical calculator does not suffer from notifications, calls, or battery drain the way a phone does. It is especially helpful during concrete pours, bar bending schedule checks, and quantity verification with contractors. At the same time, using a good calculator app on your phone as backup means you are never stuck if one option fails.
9. Smartphone with key site apps and a power bank
Your smartphone may be the single most versatile tool in your arsenal—if managed wisely. It is your camera for recording site issues, your PDF viewer for drawings, your messaging device for quick clarifications, and your portal to construction calculators and management apps.
However, heavy use of camera, data, and apps drains the battery quickly, especially outdoors. This is where a reliable power bank becomes essential. When your phone dies in the middle of an inspection or during a critical pour, you lose access to drawings, contacts, and instant documentation options. A fully charged power bank means you remain reachable and productive for the entire day.
Consider installing:
- A good PDF/DWG viewer for drawings
- Construction calculator apps
- Note-taking or checklist apps for inspections
- Cloud storage apps to sync photos and documents with the office
Used smartly, this combination reduces paperwork while improving traceability and communication.
10. Basic tool pouch or backpack
The final item on this list is about organization. A compact tool pouch, waist bag, or sturdy backpack ensures your essentials—tape, markers, scale, small level, notebook—are always within reach and not scattered across the site office, your bike, and your pockets.
This simple habit changes how you work. Instead of constantly borrowing or searching for tools, you move confidently from one inspection to another fully equipped. It also signals to workers and seniors that you are prepared and serious about your role.
Bonus tools worth adding over time
Once your core toolkit is ready, you can gradually add a few more items that make layout and checking smoother:
- Chalk line or string line for marking straight lines on floors, walls, and formwork.
- Utility knife/cutter for opening packaging, trimming tapes, and minor adjustments, used with care.
- Small hammer or multitool for quick minor fixes where permitted and safe.
These are not mandatory on day one, but they quickly become useful on almost every project.
How to build your toolkit step by step
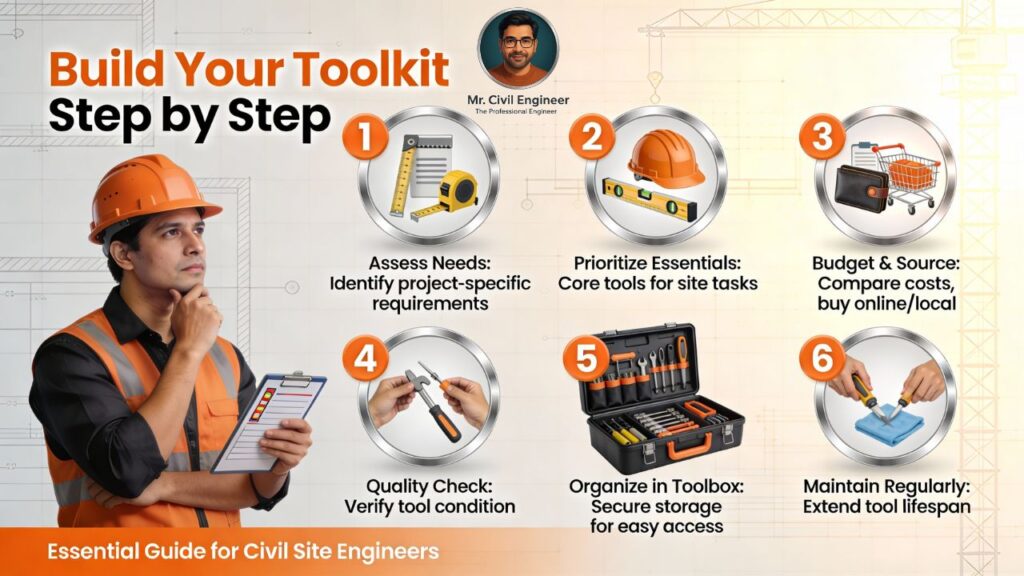
If you are a fresher or on a tight budget, you do not need to buy everything at once. A simple phased approach works well:
- Phase 1 – Safety and basics
- Helmet, safety shoes, hi-vis vest, gloves, glasses
- Measuring tape, notebook, pens, markers
- Phase 2 – Accuracy and organization
- Spirit level, drawing folder, calculator
- Phase 3 – Productivity upgrades
- Laser distance meter, power bank, compact tool pouch
Coordinate with your employer about what larger equipment they will provide—total stations, auto levels, cubes testing facilities, etc.—so you invest only in personal tools that you will use across multiple jobs and companies.
FAQs
Do I still need my own tools if the contractor already has them?
Yes. Contractor tools are primarily for their crew. As an engineer, having your own reliable tape, level, and documentation tools ensures you can independently verify work and maintain professional accountability.
Should freshers buy expensive digital tools like laser meters immediately?
Not necessarily. Start with safety gear, tape, diary, and basic level. Once you have 6–12 months of experience and understand your daily needs, investing in a good laser meter and better digital tools delivers much more value.
Which tools should I carry on me every day?
Minimum daily carry: helmet, shoes, hi-vis vest, gloves, tape, small notebook, pen/marker, phone, and, if possible, a small level and power bank. Heavier or less frequently used items can stay in the office or your bag.
Conclusion: Build your professional identity through your tools
Every site engineer remembers the day a simple tool—like a tape or diary—saved them from a serious mistake or dispute. When you own the right tools and use them consistently, you protect not just the structure but also your credibility and career.
Start with the essentials from this top-10 list, then refine and upgrade your toolkit based on your project type and personal working style. Over time, your toolkit becomes part of your professional identity: the engineer who is always prepared, precise, and dependable on site.
- Waterproofing Methods for Homes: A Complete Practical Guide
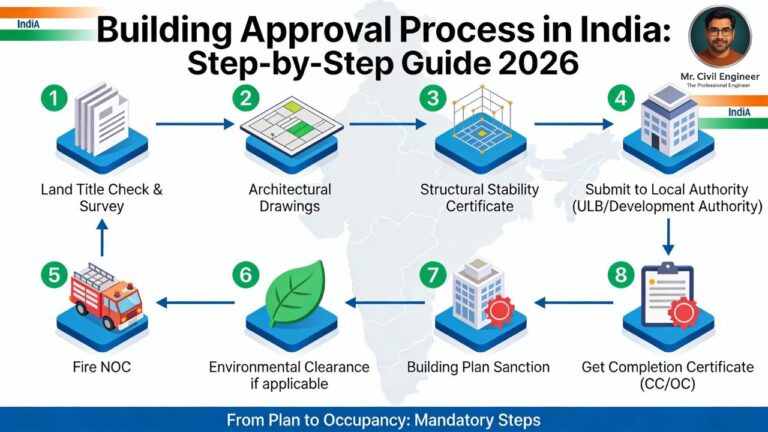
- Building Approval Process in India 2026: Step-by-Step Guide
- How AI Is Transforming Civil Engineering: Top AI Tools You Must Know
- How to Start Your Own Construction Company in India: Step-by-Step Guide 2026
- Civil Work Cost Breakdown per Square Feet in India (2026)